Comprehensive DIY Guide for Building Your Own Wooden Garden Containers
Learn how to craft durable and stylish wooden garden containers with this comprehensive DIY guide. From selecting the right wood to ensuring proper drainage and finishing touches, discover everything you need to create personalized planters that enhance your gardening space. Perfect for growing herbs, flowers, or vegetables, these handcrafted containers combine functionality with aesthetic appeal, bringing sustainability and beauty to your home garden or balcony. Start building your custom wooden garden container today and enjoy a lush, vibrant garden space.
Comprehensive DIY Guide for Building Your Own Wooden Garden Containers
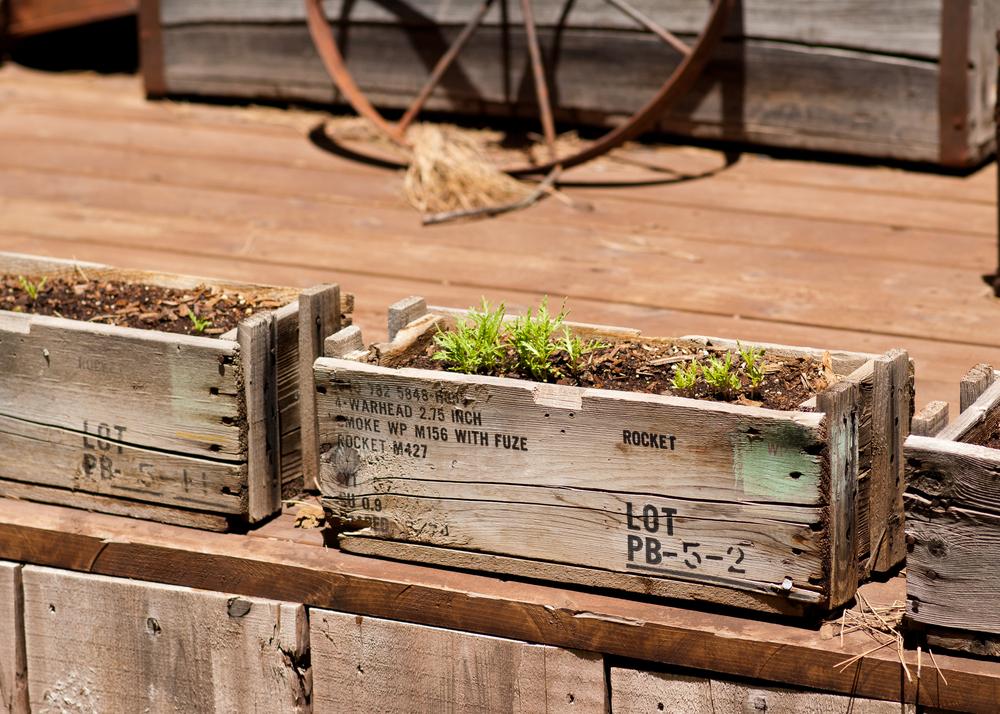
Engaging in gardening activities offers a peaceful retreat and a rewarding pastime, whether you have a sprawling backyard or a compact balcony. With careful planning and a bit of elbow grease, you can optimize your limited space and cultivate a variety of plants including vegetables, herbs, and flowers. One of the most versatile and attractive options is crafting your own wooden garden containers. These containers not only provide functional planting solutions but also enhance the aesthetic appeal of your outdoor or indoor garden spaces. Here’s an extensive step-by-step guide on how to craft durable and beautiful wooden garden containers from scratch, tailored for gardening enthusiasts of all skill levels.
Step 1: Selecting the Ideal Dimensions for Your Wooden Garden Container
The first step in creating a custom wooden garden container is to accurately measure your gardening space. Use a reliable tape measure to determine the area available and decide on the number of containers you plan to build. Once you have a clear understanding of your space constraints, choosing the right size becomes straightforward. For small balconies, window sills, or confined indoor areas, narrow and elongated containers are best because they maximize vertical and horizontal space without overwhelming the area. Conversely, for outdoor gardens or larger patio areas, wider and deeper containers allow for a more extensive root system, promoting healthier and more vigorous plant growth. Wide containers are especially suitable for growing vegetables like carrots, lettuce, or herbs such as basil and mint, as well as flowering plants that require ample space. Additionally, consider the growth habits of your plants—tall perennials and shrubs will need taller containers or support structures, so plan accordingly. Proper measurement and planning here lay the foundation for a successful gardening project.
Step 2: Choosing the Right Wood Material for Your Wooden Container
Selecting appropriate wood is crucial for the durability and safety of your garden containers. For planting edible plants, it's best to opt for untreated wood, ensuring no harmful chemicals leach into your soil, which can compromise plant health and safety. Cedar is a popular choice because it naturally resists rot and insect infestation, making it ideal for outdoor use. Other options include cypress and redwood, both known for their longevity and resistance to decay. If your project is indoor or for decorative purposes, you might consider painted or treated woods, but always ensure they are food-safe if growing herbs or vegetables. When purchasing wood, you can opt for pre-cut panels from local hardware stores, which simplifies construction, or buy full planks and cut them to size using a saw. You'll need four pieces for the sides of the container—each corresponding to your chosen dimensions—and a wider plank for the base. Cutting your own wood allows for customization, ensuring your planter fits perfectly within your designated space.
Step 3: Ensuring Proper Drainage with Properly Placed Holes
Drainage is vital for the health of your plants because waterlogged soil can cause root rot and other diseases. Once the wood pieces are cut, drill 3-4 evenly spaced holes near the bottom of each side panel. These drainage holes should be approximately 0.5 to 1 inch in diameter, ensuring they effectively allow excess water to escape while retaining enough moisture for plant roots. Use a power drill fitted with a suitable bit to make clean, precise holes. The placement of drainage holes is critical—position them towards the bottom edge of each side panel, avoiding areas prone to cracking. Proper drainage not only prevents water accumulation but also promotes healthy oxygen flow to roots, resulting in robust plant growth and increased yield for edible crops.
Step 4: Sealing and Protecting the Bottom of the Container
To prevent soil from leaking out through the drainage holes while simultaneously protecting the wooden structure from moisture damage, cover the bottom of the container with a durable sheet of nylon, vinyl, or landscape fabric. Cut the sheet to size, ensuring it covers the entire base area and overlaps with the sides slightly. Secure the sheet in place using galvanized nails or staples, creating a barrier that stops soil from seeping through the drainage holes. Additionally, this lining acts as a shield against moisture, prolonging the lifespan of your wooden container by preventing water absorption into the wood. Sealing the bottom also facilitates easy cleaning and prevents soil erosion during watering or heavy rain.
Step 5: Smoothing Edges for Safety and Aesthetic Appeal
Inspect all edges and corners of your wooden container for roughness, splinters, or protruding nails. Sanding these areas with fine-grit sandpaper ensures smooth surfaces, reducing the risk of injury when handling or moving the planter. It also enhances the visual appeal and prevents splinters from damaging plant roots or your hands. If you find any nails or staples sticking out, carefully remove or hammer them flush with the wood surface. A tidy, smooth finish not only improves safety but also makes the painting or sealing process more effective and aesthetically pleasing.
Step 6: Final Surface Treatment and Decoration
To extend the life of your wooden container and improve its appearance, apply a coat of weatherproof primer, stain, or non-toxic paint suitable for outdoor use. If you prefer a rustic look, consider natural oils designed for wood, which also help repel moisture and prevent cracking. Feel free to get creative by adding colorful designs or patterns, personalizing your planter to match your garden’s theme or your home decor. Once the surface treatment has dried completely, your wooden garden container is ready for planting. This step not only protects the wood from the elements but also allows you to showcase your style.
Step 7: Proper Placement and Secure Positioning
The placement of your garden container is essential for optimal growth and safety. For balcony or window sill installations, use sturdy brackets or mounting hardware to secure the containers, preventing accidents caused by wind or movement. When placing containers on indoor or outdoor surfaces, always lay a waterproof or drip tray underneath to protect underlying surfaces from excess water. If you plan to place your container directly on soil or outdoor ground, consider digging a shallow trench or creating a raised bed to improve stability and drainage. Position your plants thoughtfully to maximize sunlight exposure, especially for sun-loving herbs and vegetables. Proper placement ensures your plants thrive and your containers remain stable and safe.
Step 8: Maintenance and Care for Long-Lasting Use
Once your wooden container is filled with quality soil and compost mixture, you can start planting. Use support stakes or trellises for taller plants to avoid toppling, and regularly monitor soil moisture levels to prevent dryness or overwatering. Since filled containers are heavy and difficult to move, plan your placement carefully from the beginning. Regularly inspect your wooden planter for signs of wear or damage, such as splintering or rot, and apply protective finishes annually or as needed. Clean the container periodically to prevent the buildup of algae or pests. With proper care, your handcrafted wooden garden containers will serve your gardening needs for years to come, providing a beautiful and sustainable addition to your outdoor or indoor garden space. Happy planting!
Creating your own wooden garden container is an excellent way to combine creativity, sustainability, and functionality. By following this detailed guide, you can design and craft personalized planters that perfectly suit your garden, whether you aim to grow colorful flowers, aromatic herbs, or fresh vegetables. Not only do these containers enhance the visual appeal of your space, but they also promote healthier plant growth and a more sustainable gardening practice. Embrace the satisfaction of building something with your own hands while transforming your garden into a lush, thriving sanctuary.
